Showing posts with label Foodgasm a love story. Show all posts

Wednesday, 4 July 2018

Sweet Tooth: Mini Bailey's Chocolate Cheesecakes

Cheesecakes come off as one of those desserts that cost an arm and a leg in a restaurant - but there's really not much to them if you wanted to make them at home!

And of course - there's absolutely nothing wrong with eating a few of these MINI portions!

What's the secret? A muffin pan to bake these - there's the portion control bit...now whether or not you actually stick to eating only one is a whole other story!

I love making mini cheesecakes and have created a variety of different flavours (I'll post them at the bottom) and am always experimenting when given the chance to bake these little delights!
I CAN'T FREAKING ROTATE IT!

So why Bailey's and chocolate? It was a date night treat.
And why the heck not?!

What you need (makes about 14):

  • Muffin tin
  • Muffin tin liners (silicone are more environmentally friendly but if you're going to a potluck or a bake-sale with these - paper might be more ideal!)
  • Room temperature package of cream cheese
    • NOTE: I did NOT need vanilla extract because I used vanilla flavoured cream cheese!
  • Oreo cookies or similar
  • 1/4 Cup of sugar
  • 1 large egg
  • 1 tsp vanilla extract
  • 1 heaping tablespoon of cocoa powder
  • Hefty splash of Bailey's
  • Flour (possibly you'll need it to thicken the batter if you put too much Bailey's!)
  • A couple squares of dark chocolate (melted)
  • Optional:
    • whipped cream
    • strawberries or other fruit for decoration
    • crushed almonds
What to do:
  1. Pre-heat oven to 175*C.
  2. Line muffin tin with 1 muffin liner and 1 Oreo cookie in each spot
  3. In a large mixing bowl, beat together the cream cheese, sugar and egg.
  4. Add vanilla extract, cocoa powder and Bailey's.
    1. There is no measurement for Bailey's.  I'm sorry.  I go based on smell and I try to not make it too boozy-smelling. 
  5. If you put too much Bailey's - sprinkle some flour in there so it's thicker and not too wet of a batter.
  6. Pour batter into each lined cup of the muffin tin - filling them about 3/4 of the way.
    1. They'll puff up a bit when they bake and sink as they cool down.
  7. Once cooled down - remove from the pan and chill in the fridge.
  8. Let them chill a bit first in the fridge then drizzle the tops with melted chocolate and refrigerate again.
  9. Decorate even more before serving with nuts, fruit and whipped cream!
  10. Remove wrapper before eating.
  11. Enjoy responsibly.
Some other varieties you can try:
  • Peanut butter and jelly (put the jelly in the center or directly on your Oreo and then a peanut butter mixture on top!)
  • Rocky Road: make a vanilla-based cheesecake flavour and top with mini marshmallows, peanuts, candied cherries and drizzle melted chocolate when they've cooled
  • Triple chocolate
  • Chocolate mint - use a peppermint liquer or peppermint extract
  • Orange chocolate - use an orange liquer or orange extract
  • Nutella
  • "Reese's PB Cups" - mix up chocolate and peanut butter
  • Berries (whatever is in season!)
  • Fresh Lemon - use a lemon to get the juice and make sure to remove any seeds!
  • Vanilla
  • Chocolate
  • Other liquer
Experiment and have fun!

Happy Foodie Adventures!
Dominique

Thursday, 28 June 2018

Thrifty Finds: Cast Iron Pizza Pan

I don't know about you but I love shopping second-hand and quite often I get a tingly feeling whenever I think about going and know I will find something good!

Last week was no exception.
I have found so many useful things (and many not-so-useful things) at the second-hand store and last week I had this "gut instinct" to go to the second-hand store.
I had to go anyway because I am in the process of purging stuff in the possible preparation of moving for work - and because I have too much crap.

My neighbour and I took the kids and a ton of stuff to the second-hand store and after I loaded my table I cruised around and came across this beautiful gem....

A BRAND NEW CAST IRON PIZZA PAN!

Good lord I was over the moon because guess what? It was new - the cardboard cut-out still on it and I don't think it had even been seasoned at all - just a light coating of dust.
AND it was only 5€!!
We checked it out online afterward and discovered that it was worth a heck of a lot more! A similar model yet different brand and slightly bigger was worth 90€ and the same branded one was between 40-60€ depending where you shopped and if you included shipping.

I was a very happy little foodie indeed!

I cook pizza about once a week at home - I love that I can top it with anything I want and my kids only want cheese on theirs.  Maybe a couple leaves of spinach if they're feeling gracious or some prosciutto or pepperoni on other days.  
But for me - there is nothing like homemade pizza.  It takes time and effort but it feeds a lot, they all love pizza and it is much cheaper for me to make pizza than to order one to be delivered.
And no offence to those that are buyers of the frozen-section variety - because you do what you gotta do! (especially as a parent) - but it's so nice being able to control what goes in/on your pizza and also homemade usually is much tastier!
And it's awesome to cook pizza with the kids - they really love helping to roll the dough out, spread the sauce and put the toppings on it too!

And for us adults - it's an awesome date night idea.  Make a pizza together, chat and have wine and cuddle on the sofa after with a blanket and a good movie!

Anyway! I know the words "cast iron" tend to scare a lot of people!  I for one have had horrible experiences with cast iron and that is due to lack of research.

So this time - I knew I got a real piece of treasure from the shop and had to cherish it like my newly birthed 4th child.
I read the instructions that it came with.

And here are the basics:
  1. Don't use soap - major no no.
  2. Only use hot water for washing it.
  3. Don't use anything abrasive aka scratchy and rough on the pan.
  4. Season it well with oil and some paper towel - do this regularly. 
    1. I use a silicone pastry brush. 
  5. After serving your pizza from it, let it soak for a few minutes in hot water to loosen up any cheese or crumbs. Then rinse again in hot water and dry it with paper towel.  Then I season it with a light coating of oil because I don't and won't use this pan daily.  
    1. This ensures it is taken care of and looks brand spanking new every time you use it.
  6. Love your cast ironware!
Cast iron can last you much longer than your typical 20$ non-stick Teflon pan any day.

I also read how to use it and here are the basics on that:
  1. Pre-heat your pan - they recommend to heat it up in your oven once that is hot enough (maximum temperature).
    1. I opted for something online that told me that I can heat it up on the stove burner instead and then pop it in my pre-heated oven to cook my pizza.
  2. Spray or lightly oil your pan before putting pizza dough in it.
  3. Put it in a pre-heated oven - use thick oven mittens or silicone and move fast so it doesn't burn your hands through them! 
    1. Cast-iron is super hot and super heavy.
  4. Remove, serve your food and enjoy and don't forget to soak/rinse right after.
Now, I have made pizza twice in this pan (technically 3 times) and my first attempt was so fascinating and I f*cked up my pizza.  I burnt the center bottom of it and this is how...
Attempt #1
AKA How to NOT make pizza in your cast-iron pan:
  1. I turned my oven on maximum heat (300*C) and heated my pan on the stove top burner at maximum.
  2. I lightly oiled my pan and spread the oil evenly with a silicone pastry brush.
  3. I sprinkled a bit of flour before putting the pizza dough
    1. This is where I went wrong....but it said so in the booklet!
  4. I put my pizza dough, sauce and toppings and then put it in the oven for 7-10 minutes on maximum.
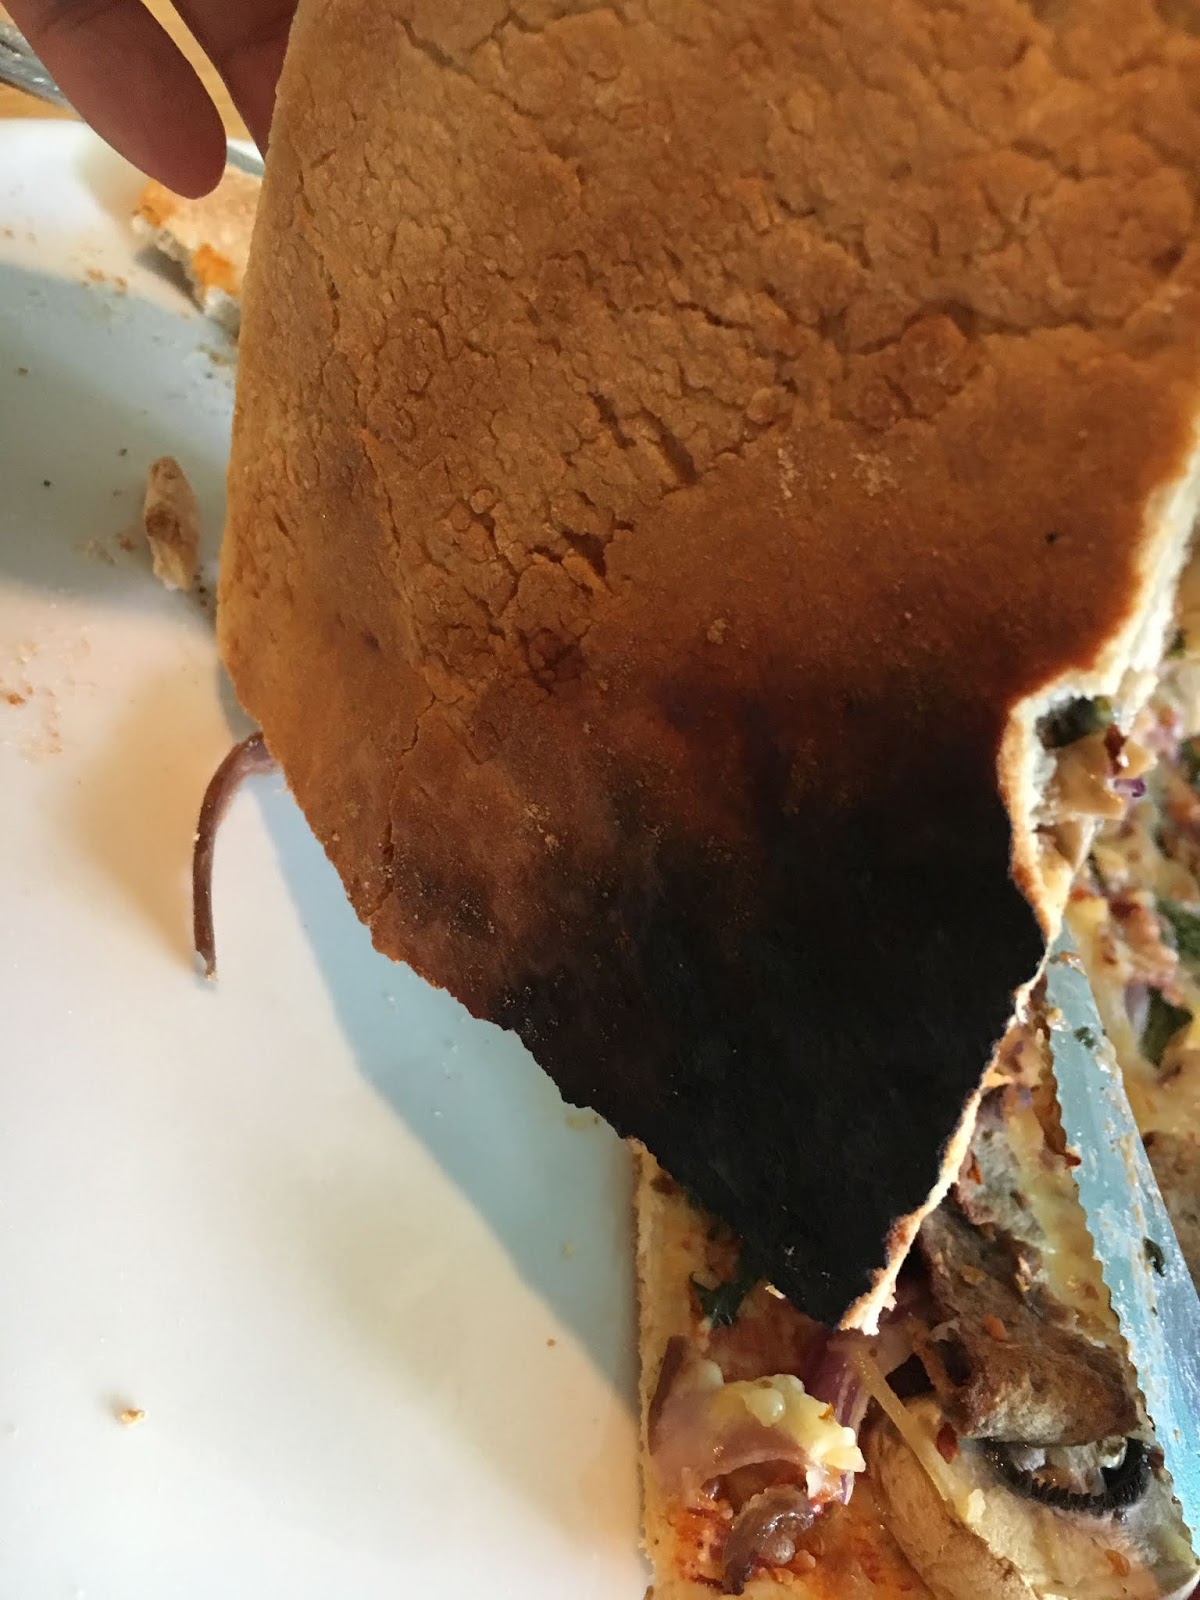
Results: Crispy crust edge and bottom but blackened center underneath.
While I may have been a sad panda - I was also an excited one! I love experimenting and I did eat the pizza - except the blackened part and I just ate the toppings because they were not burnt.
I also didn't have amazing experience cooking with cast iron - so the fact it was not a complete failure - was promising for me!

So I had to try this pan again and the results were perfect.
I had my neighbour over for "Juhannus" which in Finnish means "Mid Summer" and while traditionally you go to a cottage, grill food, get completely wasted and watch a bonfire - we opted to stay in at my place, drink a bit and make pizzas once my kiddos were asleep and just hang out.

This is what I did to make 2 amazing pizzas in my cast-iron pan:
  1. Pre-heat my oven to 225*C - this is my normal temperature for cooking pizza.
  2. Pre-heat my pan on the burner on maximum - while I was rolling out the dough*.
  3. A few drops of olive oil to the pan and spread it with the pastry brush.
  4. Put dough and immediately put sauce and toppings.
  5. Bake as per normal (7-10 minutes).
The booklet recommended I put the dough and bake it partially then put the sauce and toppings and back in the oven.  This seemed like a waste of time for me because I had split my dough batch into two (my neighbour is a vegetarian) and the crust was quite thinly rolled out.
Also it was quite dangerous because the pan is so hot and got even heavier with our heavily topped pizzas - so I didn't want to risk dropping it on my foot (I am a magnet for accidents!).

* I make my pizza dough in my bread machine using this recipe "Easy Peezy Pizza Dough" by "Genius Kitchen.com".  I would link it for you but apparently it's no longer available in my country I reside in. (*MAJOR EYE ROLL GOING ON HERE...)

I could've definitely put a bit more cheese and baked it a smidge longer - but she was happy with hers!
I skipped the sprinkling of flour - because I believe that is what started the blackened center trend of my first attempt at a cast-iron baked pizza and kept my oven at my regular temperature for baking a pizza and both of us were super pleased with our pizzas! And there weren't any burnt parts at all!

So - is it worth getting a cast-iron pan? HELL YES.  Especially if you can get one in great shape second-hand!
My guess is someone got it, got scared of how much "effort" it takes to use one and maintain it after that they just sold it for a pocketful of change.
And obviously it's way cheaper than installing an Italian style brick oven in your home!

Does it work better than a pizza stone? I had one in Canada and it's been over ten years - so I don't remember how my pizzas turned out back then (I also didn't make pizza as often either!) - but I think so yes. However, if I do come across an equally cheap and well-conditioned pizza stone - I would definitely consider getting one just for the sake of trying! (Or if any of my friends have one I could borrow because I am trying to purge stuff and not collect more!)

Does it work better than a pizza pan with holes all along the bottom? YES.  A million times yes.  Because you really do get that crispy bottom I have dreamed about with pizzas! Usually I just line my baking sheet with parchment paper and make my pizzas that way as it's a large pan and square - so it'll feed my kids easily.  But the bottom was never crispy.  The crusts (aka pizza handles) sure were - but it's not the same!


So I hope this overly lengthy post helps you and doesn't make the idea of using a cast-iron ANYTHING seem too scary or too time consuming at all! Because it wasn't!

And my neighbour also suggested that I could make crepes on the stove top with this pan, a paella and who knows what else! I don't have to restrict myself to just pizza! But I think I will for now... :D

Enjoy your tasty adventures!
Dominique

Wednesday, 13 June 2018

Classics: Homemade Salsa & Guacamole

I had to tie these two together because it is so rare for me to have one and not the other.  Especially when making tortillas/fajitas/tacos (take your pick?).

So last night I made tortillas for my boyfriend's lunch and tonight we are having them again because the salsa should be even better - having stunk up the fridge (no lid for the bowl) and having "cooked" in the fridge for a solid 24 hours.

So - let's start with salsa!
I promise this is way better than the mushy red stuff in the jars in the stores!

What you need:
MAKE THIS THE DAY BEFORE YOU PLAN TO DEVOUR IT!
The shop I am close to didn't have lime or fresh cilantro!

  • 4 large tomatoes 
  • ½ medium red onion (peeled and diced)
  • 5-8 large cloves of garlic (peeled and minced)
  • 1 can of ready to use kidney beans (rinsed and drained)
  • 1 can of ready to use black beans (rinsed and drained)
  • 1 lime juiced
  • 2-4 fresh chili peppers chopped (stems removed and seeds too if you don't want it too hot)
  • Handful of fresh cilantro chopped
  • salt and pepper
  • sugar
  • cayenne pepper
  • smoked paprika powder
  • chili powder
  • chili flakes
What to do:
  1. Wash tomatoes and cut away the bit where the stem was attached.  
    1. Chop tomatoes up
  2. Mix everything together except spices.
  3. Add spices according to preference of strength.  For me - I added a sprinkle of salt, lots of pepper, a sprinkle of sugar and a lot of the other spices - but not too much because I wanted the fresh ingredients flavours to shine through most!
    1. Stir well and add more ingredients or spices according to your preference.  
      1. I do a sniff and taste test 😀
  4. Put in a fridge-safe container with a lid (or else your fridge is going to stink!) and leave it for overnight at least - 24 hours is optimal!
  5. Enjoy it with tacos, nachos, enchiladas/tortillas/burritos/fajitas, on meat or fish - whatever floats your boat!

Next is guacamole!

What you need:
  • 2 large ripe avocados
  • 3-5 garlic cloves (peeled and minced)
  • garlic powder
  • ½ large lemon squeezed (or a whole small lime)
  • chili flakes
  • 1 tomato chopped and seeded (optional - I personally don't add this)
What to do:
  1. Remove the seed from the avocado and scoop avocado flesh into a bowl
  2. Add remaining ingredients to taste and mash until smooth
  3. Cover with plastic wrap (if not using immediately) and by "cover with plastic" I mean press it down so there's next to no air to brown your guacamole prematurely!  The lime or lemon juice prevents the browning but the lack of air definitely helps.
    1. Another option is to put a layer of plastic wrap touching the guacamole then put a lid on your container.
  4. Enjoy with everything delicious.  Especially on toast with a fried egg or without the egg if you're a vegan!


Enjoy responsibly!
Hope this helps you conquer your possible fears over how to make salsa and guacamole!!
Enjoy!
XO,
Dominique

Tuesday, 12 June 2018

Classics: Flour Tortillas

Like I said on Facebook - I am out of town currently and thought I would take advantage of this week to mentally recuperate from having my kids (and walking over 100km last week) and dealing with next to no sleep.  My daughter is going through this PERMANENT phase of waking up in the middle of the night - sooooo I was a wee bit grumpy when I arrived to my destination.

Something I have been meaning to try for years was my own flour tortillas.  I recall being in a restaurant in Halifax (name has escaped me) and you could see the waitresses making the tortillas and they had a fancy press and everything...

But I tucked that thought in the back of my head until the boyfriend made me promise healthy food this week.
I cheated and brought some banana bread with dark chocolate chips in it...and we may have split a kebab roll last night too...ANYWAY!

Then the thought hit me and once I get a food idea in my head - I cannot let it go.

So I went to the store and got everything I needed.

I used this recipe and had some mild screw ups.

First of all - I'm staying in a countryside place and there was NO cooking spray in the local corner store.
I survived using a couple drops of olive oil and a brush and spreading it around evenly.  Then I only used the brush between new tortillas being placed in the pan!

Second of all - he has a frying pan with tall sides and a small wok.  So I may have rolled them out too large and they were thick in some parts and thin in others.
I survived by not caring!

Third?
Because third time's a charm - I may have cooked them a wee bit too long.  Not that they were burnt but because they quickly turned into a tortilla chip!
I survived yet again by not caring and eating it anyway!

So now I know for next time.  Cook them on a lower heat or for shorter on a hotter temperature!

Otherwise - I am happy with my first attempt and despite eating half a kebab roll - I couldn't resist it and opted to make a tiny tortilla filled with homemade guacamole and salsa and spiced chicken for myself - you know, for testing purposes.

AND I DIED AND WENT TO HEAVEN.


It was soft and fluffy and warm and way tastier than the paper thin ones from the grocery store - yes even better than the herb and garlic ones (oooh I should try that next!) - which of course would've been a hell of a lot more convenient but y'know - for Instagram and blogging purposes - I just HAD to try this.  And because I know my kids won't eat these with any fillings in them - I probably won't make them in the future any time soon unless for friends or when I am visiting the boyfriend!

I shall make a new post about the fillings at another time because the gym is screaming my name...it's been far too long!  The kids had a summer holiday last week (aka no day-care or school) and will do so again next week when they're with me - so I am trying to crank out the workouts with them via walking crazy long distances and gym time when I am not with them.

Thanks for reading and happy foodie adventures!
XO,
Dominique

Saturday, 26 May 2018

Flexible Dish: Chicken & Pesto Pasta

I may as well permanently apologize for all my future delayed posts because I am like that.  I just get caught up with the kids and LIFE...but will try to be more active and not just sharing pics of food via Instagram!

I don't know why but I didn't taste pesto until I was a mom.  A mom of 3...and even then it wasn't something I chose to try.  Let's just say that pesto wasn't in my household growing up either...

But anyway I absolutely freaking love it.

It's basil-y and garlic-y and so green and healthy and delicious.

I have made my own once and it was tasty too but pine nuts are crazy expensive - so I now opt for the no-name/generic store brand named stuff and am just as happy...my wallet is happier too.

My neighbour is a vegetarian and she keeps sending me snap chat pics (or is it just called "snaps"?) of her "pesto pasta" and I thought - it cannot be that hard.

So one night I felt like pasta and this is obviously a dish my kids will not eat - so I made sure to enjoy it at night while they slept.  And it was glorious.

It might change your life.

It's kind of like when I discovered how easy (although time consuming!) making fresh pasta was - and I was addicted.

Well, have no fear - I used store bought whatever shape is in your cupboard pasta.  So that'll save you a crap load of time.

Unlike my vegetarian buddy - I added some cooked chicken pieces, shredded prosciutto, some sliced veggies and a lot of chili flakes - and I have 0 regrets.

And you know what else is freaking awesome?!  You can eat this as a main dish, a side dish, a guilty pleasure dish, hot or cold...or when you need to fend off someone with your stellar pesto-y breath...don't limit yourself.  The skies are the limit.
Hence the "Flexible Dish" section of the blog I just added today.

As always - measurements are guess-timates.

What you need (portioned for 2 very hungry people):

  • 3 cooked and lightly seasoned (salt and pepper with minced garlic) chicken breasts
  • 4 strips of prosciutto shredded with your fingers
  • 1/2 medium red onion peeled and chopped
  • 5 large white mushrooms washed and sliced
  • 1/2 red pepper washed, seeded and diced
  • Pasta in fun shapes (I used heart-shaped ones)
  • oil
  • salt
  • Ready-made pesto
  • Cream cheese (plain)
  • Milk or cream
  • chili flakes
What to do:
  • Boil water and add a bit of oil and a pinch of salt
  • Add pasta and cook according to directions
  • Drain the pasta but save a bit of the water (maybe a tablespoon's worth!) - remove from heat!
  • In a separate pan or sauce pan - put some oil and fry the veggies a bit on high heat
  • Add a couple heaping tablespoons of pesto into the pot with the pasta, the chicken and veggies
  • Add a monster sized blob (aka a massive heaping tablespoon of cream cheese) and stir while on low heat
    • Or just shut off the heat - your burner will be warm enough to keep cooking the "sauce" part of this recipe. Just make sure you're constantly stirring and keeping an eye on it so it doesn't burn!
    • Add a bit of milk (or cream) to your pasta pot, stirring regularly so the cheese melts and the pesto is well blended in too
  • Stir in shredded prosciutto and chili flakes according to taste and serve hot!

    or
  • Let it cool and chill it in the fridge and serve it as a cold pasta salad
I had some that night and the next day straight out of the fridge and it was delicious both ways!


I genuinely love my neighbour and hate her at the same time (lovingly) for introducing me to such a SIMPLE meal that I made a bit extra with protein and veggies.

Confession time...I had some pesto pasta tonight - without the protein or veggies - because I walked 15km today and was feeling a bit lazy...
Isn't that awesome though? Not the 15 km part but how freaking flexible this meal is.

And it's fairly CHEAP!  You can of course adjust what veggies you want in there - the veggies I listed were merely suggestions as they were what I had on hand.

Enjoy this dish in your nicest pair of yoga pants/sweats and please don't hate me for loving this dish...
Blame my neighbour.

XO,
Dominique

Saturday, 24 March 2018

Real Talk: Working in a Restaurant

Alright folks - let's get to the nitty gritty.

Working in a restaurant.

Sounds busy and it can be.  And it SHOULD be.  Being bored for 8 hours and you're not allowed to use your phone in the kitchen is very frustrating indeed.

Once upon a time I was 19 and a waitress for my aunt for a summer and it was one of the most exciting and exhausting jobs I have ever done (other than motherhood - which is a forever-long gig) so now that I have some experience and have witnessed what the owners have done as well and can perhaps give you some insight on what it's like to work in a restaurant.
Bear in mind - these are based on my personal experiences and every restaurant and person is different.

Waitress

Things you (may/most likely) have to handle or deal with:
  • Cleaning the restaurant 
    • Washing windows
    • Cleaning tables 
    • Clearing off tables
    • Vacuuming and mopping floors
    • Cleaning the bathrooms
    • Doing dishes
    • Cleaning up accidents (i.e. spilled food, broken dishes, vomit -hopefully not)
  • Refilling condiments 
    • Salt and pepper shakers
    • ketchup or other sauces in little bowls perhaps
    • filling a salad bar or buffet
  • Customer service
    • As a host(ess) finding seating for your customers
    • Accommodating customers needs and demands
    • Taking their orders
    • Serving their food and beverages in a timely manner
    • Handling customer complaints
    • Packing take-away orders or leftovers
    • Handling customer reservations and inquiries on the phone/e-mail
    • Processing payments (cash, bank/credit cards, gift cards, coupons and discount vouchers)
      • So much math....splitting bills for example and calculating tips if need be.
  • Other
    • Planning schedules for other staff and handling reservations
    • Long hours and on your feet for most of it
    • Organizing catering services (includes setting up the location and food perhaps)
    • Dealing with extremely flirtatious customers that might not accept "no" for an answer.
    • Dealing with alcoholic or troubled customers that may exhaust you mentally and possibly try to hurt you physically if you deny them services.
    • Dealing with customers smearing you publicly and privately - for example by word of mouth or describing you on the restaurant's public social media pages.
      • AKA bullying
Cooking

Things you may/most likely have to deal with in the kitchen:
  • Running out of ingredients
    • Naturally this is prime time that customers want that particular meal or dish with those missing ingredients! :)
  • Equipment breaking or missing
    • It's why it's crucial to know where everything goes and to put things back once you're done!
  • Yelling - you're yelling, serving staff yelling, your boss yelling - everyone yells...
    • Usually depends on the size of the kitchen!
  • Lack of space  - counter space can be limited and you may be bumping elbows with that coworker you can't stand more often than not.
    • Also when it comes to unloading a lot of ingredients and stock/supply - it can get pretty cramped!
  • Service staff dropping food and having to re-do a dish from scratch.
  • Pain
    • burning yourself
    • cutting yourself
    • losing a finger (tip or whole) or other body part *I personally haven't done this or witnessed this - but I've heard stories!)
    • bumping yourself by walking into or tripping over something
    • dropping heavy things on yourself
    • heavy lifting
    • Long hours on your feet
    • dry skin from excessively washing and disinfecting your hands
      • Bear in mind I live in a dry part of Finland.
  • Stress
    • Customers complaining and returning food
    • Large groups of customers ordering at once (or several customers ordering at once)
    • Customers changing their orders last moment - usually once their food is about to be served.
    • Not having enough staff to assist
    • Messing up dishes or plating
    • memorizing the menu - especially if it's a large one or changes regularly
  • Cleaning
    • doing dishes and putting everything away
    • emptying the deep fryer and cleaning the grill
    • cleaning the gas stove
    • cleaning floors
    • washing some dishes by hand
    • cleaning dishes with hard stuck-on food (this is why rule #1 is to SOAK it all!)
    • emptying the food traps in the industrial dishwashers or in the floor (they smell rotten and like death and only the brave can handle it without vomiting all over themselves)
    • doing a massive deep clean a few times a year 
Owner/Management
  • Planning schedules for catering and staff
  • Taking orders via e-mail and phone calls for reservations, dinner parties and catering services requests
  • Handling social media accounts and television/radio interviews for promotional purposes
  • Handling customer/staff complaints and conflict
  • Creating new menus and specials
  • Dealing with repair and regular maintenance/check-ups for all equipment and the building itself
  • Taxes (ugh)
  • Processing everyone's pay
  • Interviewing and hiring new staff
    • Ensuring they are properly trained for the work environment
  • Ensuring there's enough food per shipment and ordering regularly
  • Budgeting
  • Firing staff
  • Handling inquiries within staff (i.e. if someone is stealing tips or possibly stealing from the restaurant)
  • Ensuring all bills are paid on time
  • Ordering new equipment and dishes/supplies
  • Deal with busier times and not so demanding times from customers (ie Christmas time is usually quite busy but after the new year - not so much).
  • Little sleep (depending on the hours of the restaurant - you might work from morning to close!)
  • Little personal time off or vacation time
I am sure there are a lot of things I am missing and some might not apply to you!
But perhaps this will give you a glimpse into the life of a restaurant worker and show you how difficult it can be.

It is partially why I do not want to have my own place.  I used to think it would be a great way to live but now that I have children - I don't think I could do it until they perhaps were independent and moved out.

It's also why I strongly believe that those who work in a restaurant are super strong mentally - because they have to do and remember so many things and work together as a team to get through the day.
A cook or head chef is no better than a waitress and vice verca.  Both are very demanding jobs and should be respected equally.

XO,
Dominique

Monday, 19 March 2018

Real Talk: The Truth About Cooking School

Ah yes - you want to be a cook/chef (pick your term) and want to know the truth and dirt?  Alright - I'll happily lay it out on the table for you.

Please bear in mind - I studied in Finland (I am a Canadian) and in Finnish (and I'm awful at languages) and I completed a 2-years vocational program.
So I studied the basics and this post is strictly based on my experiences.

Here is what I learned:
  • As a cooking student - you're instructed to purchase a white chef coat.  Which is ridiculous because we all know what happens in the kitchen - stains your coat.  Forever.
    • The lady who sold me my chef coat sold me one three sizes too big because she said "All first years gain a lot of weight."  Thanks Marta - I didn't gain THAT much....
  • You will most likely gain some weight most likely (unless you're mega conscious of what you eat or have a ton of allergies and intolerances/sensitivities). 
      • Or you're a die hard gym/work-out fanatic.
    • You have to taste test what you are cooking before it goes out to the other students or actual student restaurant (we had one) and you usually eat on site as well.
    • Freshly baked bread is hard to avoid.
    • Really good smelling and tasting food is hard to avoid.
      • It was also not common in the basic kitchens because Finnish food is rather bland in flavour (in terms of spices) but is really healthy and focuses more on natural flavour of the primary ingredients.  Like smoked reindeer or salmon - or potatoes.
  • There's always that one (or more) person that might kill you by accident...
    • Burning you
    • stabbing you
    • dropping heavy stuff on you
    • not carrying their share of the weight and you're lifting something together so you might pull something...
  • You might have an accident at work - keep calm, perform first aid and know it won't be the last time you burn or cut yourself in the kitchen.
  • It's a billion times harder to study a subject in a language not native to your own.
  • Jelly-roll cakes are far too easy to make.
  • Work practices are terrifying but DO prepare you for the real world.
  • Sometimes you embrace theory classes and wearing normal clothes and sitting on your butt for a few hours - sometimes you wish you were peeling onions all day with a blunt knife.
  • There's always that one in class that references some world famous chef in every. Single. Class.
  • There's always that one in class (or more) that think they are world famous chefs.
  • Accidents really do and can happen.  
  • Just because you don't eat or like the food doesn't mean you're not expected to taste it.  (Unless it's of a religious/cultural reason or you're of a particular strict diet - ie vegan).
  • You cannot stress in the kitchen.  Ever.
  • You also do not know how to wash your hands properly until they show you how poor of a job you did...doesn't matter if you sang Happy Birthday three times while sudsing up!  Their magic powder they sprinkle on your hands to UV-scan for germs and bacteria AFTER you've washed your hands will show you just how wrong you are.
Here's my advice on surviving culinary arts - especially if it has a very hands-on program like mine did:
  • Avoid getting new tattoos that could be exposed in a chef outfit while you're studying.  For the sake of hygiene (both toward your skin and the food) - try and hold off.
    • Same with piercings.  We were not allowed any earrings at all - not even studs - when in the kitchen.  One classmate had had hers just pierced before class started and it was still healing - so they allowed her to cover it up with a bandaid.
  • Say goodbye to nail polish, jewelry and even your fitness wrist tracker (i.e. Polar, Fitbit etc.) - hello hygiene and food safety.
  • Shop for your chef coat second hand if you can nab one in your size.  Get a back-up coat! They get dirty fast! I got a black one - which I'm glad I had for work practices and a future job - because your "It was white when I bought it - now it's various shades of processed stomach lining" won't look so fantastic and stain-free forever.  Black is much more forgiving!
  • Don't be a snob - everyone has to clean.  Dirty dishes, emptying drains, scrubbing floors and surfaces.
    • There's hand disinfectant for a reason.
  • Just because you're of a particular diet - for example, a vegan - doesn't mean you won't be handling meat or other animal-produced products.  The chance of you getting a job in a restaurant that caters to your diet (vegan or otherwise) is slim to none - depending on the popularity of it and where you're located.
    • No, I am not dissing vegans or specialty diets.  My BFF back in Canada is a vegan and I adore her and respect her food choices. :) I am just being honest with my statement.
    • Of course if you have the ability - financial, physically and mentally - you could always open up a café or small restaurant that does cater to customers with a similar diet lifestyle as yours. :)
  • Your hands have seen its better days.  
    • I'm not one for having any kind of hand-care routine but I do try to moisturize a lot more now. 
  • Your face will acquire a shine like no other - so I recommend skipping makeup - because you may get a steam regularly in the kitchen and you end up wiping your face..or those onions can make everyone tear up a bit...hello panda eyes!
  • You'll be on your feet a lot - if you can - invest into the no-slip safety shoes that are super comfy or really good insoles.
  • You should be somewhat physically fit when in the kitchen because there will be some heavy lifting required.
  • Theory can be boring.  I am more of a hands-on theory learner.
  • If you don't swear - you will in the kitchen.  It kinda goes hand in hand with the job.
  • Ask questions.  There are rarely such things as stupid questions - so be bold.  Ask.
    • It's better to ask than to end up wasting a lot of ingredients because you didn't ask something important.  Regardless of how silly it may be.
  • Always have a pen or pencil in your coat sleeve - you may need to calculate different measurements or make notes on the recipe if given a copy.
  • Nobody is perfect - even the high class chefs have their flaws.  Even if you don't see it on television or in their cookbook photos ;).  They also have decades of experience and many have traveled all over the world to gain their recipes and experiences!
  • A lint brush is your best friend - especially if you have pets!
  • Be yourself.  Add a bit of you into the dish - whether it's slightly spicing it differently (within reason - bear in mind allergies) or plating it a particular way.
  • If your teacher asks for your opinion - it usually means they think you're doing quite well/know what you're doing and they value your opinion and want to know what you would do!  It's a huge compliment!!
  • Learn how to light a gas stove.  My school didn't have them and I felt like a moron at my current job for not knowing how.
  • Practice good hygiene.  Remember that people are paying you to cook food some day and they are doing so because they TRUST that the kitchen is cleaned regularly and that the staff are CLEAN and professional.  Even if you're just working at McDonald's or some small café - good hygiene goes a long way!
    • So what I mean is put away your phone and have it on silent. 
    • Don't pick the dirt from your nose/nails in the kitchen.  Do that in the bathroom and wash/disinfect. (You'd be surprised but I had a classmate that was picking his nails in front of the customers - and thought it was no big deal...)
    • Shower regularly.
    • Please wear antiperspirant of some kind if you can.  Kitchens can be small or you may have limited counter space to work together...nobody wants to smell the funk.
    • Wash your chef clothes regularly too.
  • Be polite and know your menu because maybe you'll get a job or a work practice where you have to fill a lunch buffet table for example and customers will want to know specific things about the food available.
  • You may learn how to wait tables too - and there's a lot to that as well!  It takes a village to run a successful restaurant - even if it's a student practice one.
That's about all I can think of off the top of my head and seeing as this is 2-days overdue to be posted (I had the kids - that messes everything up scheduling-wise!) - I better hit "publish" so you can read this!
Thanks and enjoy cooking school!

XO,
Dominique

Friday, 16 March 2018

Appetizer: Stuffed Croissants

"Stuffed croissants" might sound all fancy pants but I assure you it isn't.  Want to know why?

I buy the canned ready to roll and bake croissants because it's easier and because it's handy.

Last night I went grocery shopping with a bestie and 2/3 kids and we went a bit longer than expected and while ham and cheese stuffed croissants from the bakery aisle was the easy AF route - it was also quite costly.  3€ for 4 croissants and I have 3 kids - so obviously they need more than one croissant each.

So I opted for the canned croissants (2€ for 6 in a can), a package of hot dogs and knew that I had shredded cheese at home.
They're known all over as "pigs in a blanket".  I told my kids they're hot dogs and they were cool with it.

Once I got a ton of groceries unpacked it was already their bedtime prep time anyway.  So "hot dogs" was their supper last night and I know that sounds like a "thrilling" blog post but I assure you there's more.


Once you pop them open
Once you un-ravel it you'll see triangles
Pigs in a blanket and a couple cheese ones.

Do you know what you can do with these croissants in a can?!

Here's some ideas for filling the croissant triangles before rolling them up and baking them according to your package's instructions:

  • Pizza filled: Open up a croissant triangle and brush some tomato puree, sprinkle some spices (pizza spices mix: salt and pepper, rosemary, oregano, thyme, basil and parsley), fill with some pepperoni slices (or chopped bacon) and shredded cheese and roll into croissant shape.  Top with more cheese if you like. 
  • Spinach and feta filled: In a pan on medium heat, fry some minced garlic gloves in a bit of olive oil and add spinach until spinach is limp.  Squeeze out any excess liquid.  Fill croissant triangles with this spinach mixture and add a bit of cubed feta.
  • Nutella: Spread Nutella in a croissant triangle.
  • Ham & Cheese: Line croissant triangle with a slice of deli ham (or flake a can of ham with a fork) or flaky ham and sprinkle with cheese inside and outside after rolling
    • Pigs in a blanket
      200*C for 10 minutes
    • Another option for a cheese-filled croissant is to buy a block of your favourite cheese and cut thin stick-like pieces and use those for the inside and shredded cheese on top of the rolled croissant.
  • Apple and Cinnamon: make sure your apple is chopped small and soft, sprinkle with cinnamon and a pinch of brown sugar.
  • Pigs in a Blanket: put a hot dog/wiener at the base of the triangle and roll it (slice of cheese could fit in there too).
  • Chicken: Using cooked and shredded chicken - you can fill the croissant with this and some salsa or pesto!
  • Burger: Using cooked ground beef, some relish, ketchup and mustard or whatever condiments you prefer on a burger.
The results are pretty wide open and you can always experiment. 😉

XO,
Dominique

Thursday, 15 March 2018

Health Nut: Smoothies! (and Real Talk)

There's a bit of a rant/real talk - just scroll through until you see in super big text "SMOOTHIES" if you want to get to the recipe.  


No automatic alt text available.
Frozen mango and pineapple chunks with berries, banana and coconut milk.

"Health Nut" - yeah don't worry I'm not one.  I religiously attend Burger King confessions with a side of McDonald's weekly - I call it "bonding with my God daughter" - but let's face it...it's all a cover up.
I'm just using these Common Categories (found on the right hand side of this blog) so it's easier to find things you might be particularly interested in. 😊

I do try to be healthy for about 90% of the month and that includes a lot of wiggle room...like 50%.

This week is my turn to have the kids (and it's Thursday night as I type this) and I have found myself in a particular situation this week.
I was broke AF.  I'm talking I am working part-time/on-call at a restaurant downtown with not many hours and panicking.  By "not many hours" I mean I haven't worked in awhile and won't be working with them for a total of a month due to lack of demand.  Full-time staff get priority over me of course so - what's a gal gotta do?
I had to think and think hard  (and apply everywhere of course).

I had been re-thinking how productive I have been (or not) lately and decided to bump it up.
Little things to be productive like:
  • hang my clothes as soon as they're done in the wash - sounds obvious and whatnot but sometimes the kids just pull me in 3 different directions that I perhaps forget to hang the laundry for a day or two!
    • I have now adopted the mindset that "if I hang my laundry to dry - that is being productive because it's not sitting wet somewhere".  
      • FYI dryers are not common in Finland at all.  Most people hang their stuff to dry because it saves energy and while it might not get rid of the dog hair - I'm down with saving money and the environment when I can.
  • Run the dishwasher AND the washing machine at the same time - and I could take a nap because I literally can nap anywhere (it's a parent skill) and two machines are helping me out.
    • Bear in mind my dishwasher is second hand (washing machine too) and it's a piece of sh*t.  It rarely washes EVERYTHING on the first try.  And yes, I've cleaned the filter and washed it out every 2 weeks with some special gel stuff.
  • Walk my dog Loki (who is a regular tester in my kitchen and by "tester" I mean he steals food whenever he can and has Level 5000 Ninja skills) while getting the kids and taking them to day-care/school too.
    • Because then I can blog in peace afterward.
Then I decided with the financial situation - I need to be smarter.
That also meant being a firmer mother and not bending over backward for my pickiest eater of all - A-Man.  Who is 6, has a 6-pack - yet never did a sit-up/plank or curl up in his life - and eats mostly carbs.  Pasta, bread and fries are his favourite and he totally gets away with it.
(No, he doesn't have any allergies or sensitivities - he is just picky and has some language issues we are trying to help him along with.)

I look at McDonald's and my chubby rolls start doing their own happy dance.

So I decided I was going to cut back on the grocery store trips.  I travel by bus and it was eating up a lot of my time. 15-minutes there and 15-minutes back plus wandering about (it's huge) and sticking to my list...
I decided this week some new rules for myself:
  • Clean out the freezer - I save so much and rarely use it due to my picky eater (he doesn't eat a lot of meat which is what I typically freeze) before buying more meat for example.
  • 1-2 trips/week maximum to the store: No matter what.  If I am out of milk - tough.  The kids can drink water easily.  So can I.  Unless it was a recipe that required something I had absolute none of that particular ingredient - I am not going out.  If I can manage with less than X amount of sugar or whatever - I'll do so and my waist will thank me later.
    • I've also been cutting back my milk consumption and option for dairy-free options due to my excessive bloating and trying to be a "Health Nut".
  • Stick to the grocery list.  I use an app to help me out and I usually do pretty well with it.
  • Plan Meals in advance: instead of the night before - plan ahead a bit more and let the kids have leftovers - or the same food two days in a row.  
    • Their father was never a fan of leftovers so they're not used to the concept of having the same food two days in a row.  Doesn't matter if it gets tastier either - like soup.  They don't like soup anyway - go figure.
So far - it's been going well!

Now that I have that real talk out of the way (I am sure there will be more) - let's get on to the recipe!

Smoothies.  

Smoothies are SO freaking easy!  I noticed that I have a lot of frozen berries in my freezer and I always have bananas on hand - so I decided to whip out the Kenwood Chef Sense (aka my mixer with the blender attachment) and blitz some smoothies regularly.

I love smoothies and they're healthy and tasty...I used to think they were so time consuming but now I think of them as rather quick and easy to toss together.

Because similar to fried rice - you just dump whatever the heck you want into a blender and blend it then drink it. This makes them super filling too!
This is a great way to clear up freezer space and prevent yourself from buying more produce you might not necessarily need - especially for a smoothie which is just a pureed blend of fruit and liquid anyway.

No automatic alt text available.
Avocado, banana, strawberry Greek yoghurt with coconut milk and topped with more toasted coconut.
Smoothies are also very forgiving.  So if you make something too sour - add some honey or bananas. If it's too green looking - add some berries for a red or purple hue -or cocoa powder and make it chocolate-y.

I recommend a high power blender - hand blenders (aka immersion blenders) are great for saving space but never seemed to do the trick for me.

I always put my frozen chunks of fruit or berries firs -, some yogurt, some fresh fruit and veggies and then top it off with some liquid like juice, oat drink or nut milk.

Everything I list below are merely suggestions.  You can mix and match to your preference, taste and budget.  I also haven't tried some of the bolder tastes out there or more exotic fruits - so be brave!

If you f*ck up -- add honey.  You'll be fine honey!
Like what I did there? Ok..I'll stop.

What you need:
  • A blender with a lid (so when it's on you won't decorate your walls like a blind interior designer)!
What you could use:
  • Frozen fruit or berries: In Finland, frozen berries are a staple throughout the year until the next berry-picking season.  Everyone picks berries because they're free and plentiful. So make some space in your freezer by blitzing them in your smoothies, tossing them in your oatmeal to help cool it off, bake muffins, whip up pancakes - I'm going off track here.  Oops.
    • If you're really pressed for time or simply cannot physically prep fruits and veggies to freeze - most grocery stores sell frozen packaged pre-chopped and ready to blend frozen chunks of fruit and berries.  
      • Depending on the seasons - they may be a cheaper alternative to getting fresh produce.
        • Don't hate yourself or others for going the slightly easier route.  It's your/their budget and perhaps it's just easier.  Whether you have kids or not or you're swamped with work - cut a bag open and toss it in the blender. Any extra unused frozen fruit or berries can be tossed back in the freezer for later.
  • Honey or agave syrup: agave is lovely and great for those that are vegan.
  • Fresh fruit: I always have bananas on hand because if they don't get eaten - they go into a smoothie or banana bread.
    • I also have a bag of avocados as part of my weekly grocery list.  They're kind of pricey but once they begin to soften after a couple days at room temperature - I put the whole bag in the fridge and take them out when I need them.  They last so much longer this way!
    • Citrus fruit
  • Fresh veggies: I prefer juicing the veggies (like root veggies) because they're so hard to process in a blender but something like spinach could be handy.
  • Yogurt: whether you go natural, low-fat, regular-fat, Greek, Turkish, frozen, vegan-friendly or already flavoured - yogurt adds that extra oomph to make an awesome smoothie.
  • Toasted coconut: I recently made some of Chrissy Teigen's coconut rice and had a bunch of toasted shredded coconut leftover - so I just keep it in a jar and sprinkle it in/on top for the sake of a decent Instagram photo. And it tastes yummy - obviously.
  • Spices/other: protein powder, cinnamon or nutmeg, cocoa powder, vanilla, mint leaves, lemongrass, wheat grass
  • Liquid: Whether it be juice, crushed ice, milk (cow, goat, lactose-free, chocolate, oat, rice or some kind of nut milk) - this will help everything go smoothly and especially when working with frozen fruits - you'll need liquid to prevent your blender from going into overdrive and possibly burning itself out.
Put together in a blender with the lid on - being sure not to overflow it and blend away until smooth and your preferred consistency.

Enjoy cold and refrigerate whatever isn't consumed for later.
Bottoms up and enjoy!

XO,
Dominique

Wednesday, 14 March 2018

Classics: Spaghetti & Meatballs

I don't know about you but my kids pretty much hate everything I put in front of them.
I grew up with the whole "don't eat it - don't get to leave the table" method and it didn't work for me as I would secretly dump my green pepper chunks onto my brother's plate secretly....then he caught me and I got busted.

Anyway - my oldest kid (8)  has non-verbal autism and his eating habits are getting much better.
My 6-year old is a jerk when it comes to food.  This kid can eat nothing but carbs and still have a 6-pack without doing a single plank or sit up.
My 4-year old is willing to try things and she is probably one of my favourites when it comes to meal time because she is so darn appreciative of everything she eats.  Even if she doesn't like it - she isn't rude about it and just tells me politely, "Mommy - no thank you.  I don't like it.  It tastes yucky in my mouth."
Which is actually way nicer than my 6-year old screeching how disgusted he is, how he might die and puke and choke (I still haven't figured out which order that will occur) and kind of ruins meal time for everyone by his obnoxious protests.
And if he does try something - it's the size of a grain of rice and he has already decided it tastes disgusting/yucky/awful/stinky etc.

Anyway - back on track here...
I recently discovered Alton Brown has a way of cooking meatballs that are genuinely perfect every time.

Think and think hard - have you ever had a meatball that was truly crispy on the outside and juicy on the inside? I know I haven't.  Sure you can bake them or fry them - but the result is the same.  You get greasy, kinda blegh meatballs every time.  Or even worse - they are *gasp* dry.  Which is almost as bad as a dry chocolate cake....

So, something came up about a month ago on my Facebook newsfeed.  Alton Brown kitchen hacks and one of them being to bake your meatballs in an empty cardboard egg carton!
ABSOLUTELY brilliant!

"Oh but what if the cardboard catches on fire?"

Nope it won't happen unless you leave them in too long or have the heat on too high or your oven is broken and faulty.

I've never had a perfectly crispy on the outside, juice on the inside meatball before until recently and it's thanks to him.

I shared it on Instagram and my friends went nuts.  Of course there were a few that were worried about the cleanliness of the carton - which I agree - it can be risky...but Alton is a scientist.  A genius.  And I was willing to take that risk.
I also live in Finland where the risk of salmonella is quite low because there's a lot of strict regulations regarding livestock, produce and visiting farms is almost impossible.

My American friend has made them regularly herself as well and she shared with me that she even made them with a sauce in the slow cooker (first baked in the oven then in the slow cooker for 4 hours in a sauce) and they held their shape.

So naturally, I had to make spaghetti - which is typical "day 2 with the kids" supper.

What you need:

  • Ground beef, pork or lamb (or even chicken)
  • 1 medium chopped onion
  • 4-6 cloves of minced garlic
  • bread crumbs
  • 2 large eggs
  • Spices: 
    • salt
    • pepper spice mix (sometimes known as "Montreal Steak Spice")
    • rosemary
    • roasted garlic
    • smoked paprika powder
    • splash of worcestershire sauce
  • empty cardboard egg carton
  • Baking pan with baking paper on it 
    • Baking paper isn't really necessary because the magical thing is that the cardboard absorbs the grease like crazy! (Hence the crispy outside...)
  • Spaghetti
    • pot
    • water
    • pinch of salt
    • splash of oil
  • Pasta sauce
    • Deep frying pan or wok
    • You can also add spices to this:
      • oregano, parsley, rosemary, thyme, basil, salt and pepper, pinch of sugar etc.
    • You can also add chopped veggies to this:
      • garlic, onions, mushrooms, celery, carrot, spinach, zucchini or egg plant are some examples
  • Parmesan or shredded cheese on top
What to do:
  1. Pre-heat your oven to 400*F (200*C)
  2. Mix your meat, chopped onion, minced garlic, brad crumbs, eggs and spices well by hand.
  3. Form them into meatballs and place inside the egg carton.
  4. Place in oven once it's ready and bake for 20 minutes.
  5. Meanwhile, boil water for pasta and once boiling add your pinch of salt and splash of oil and cook according to instructions.
  6. Spray or add a small splash of olive oil to your other pan for the sauce and begin to fry your veggies.  Add your sauce and spices and once the meatballs are done - add those as well.
  7. DISCARD THE EGG CARTON. You probably don't want to use it again and it got two uses out of it - so toss it away in recycables or composting - whichever is suitable.
  8. Drain pasta - reserving a couple spoonfuls of pasta water to stir into the sauce...
  9. Serve the meatballs sauce on top of the pasta and enjoy!
    1. Option 1: Serve with cheesy garlic pull apart bread!
    2. Option 2: Serve with slices of garlic bread.
      1. Take sliced bread (homemade or store bought - doesn't matter) and butter it then sprinkle garlic powder on it and cheese.  Bake until toasted and cheese has melte
Another alternative:
  • Fry your veggies and meat (not making the meatballs or adding them 4 hours prior to serving) and adding the sauce to a slow cooker on low - stirring on occasion if possible.


Enjoy!
XO,
Dominique


Soup: Spicy Creamy Shrimp Soup

I have never made shrimp soup before.
I was out of town recently and my colleague whipped this up and while I would've loved to add a lot more things to it - I'll share how it was made and my ideas in the "optional" section.

Don't get me wrong! It was filling and lovely - but that's the thing with cooking in someone else's kitchen is that you might not have access to the same spices or tools you would have if you were home or in a more familiar kitchen. :)
This was based on me mildly observing what they were pouring into the pot because I was stuck with the task of dicing an onion with a paring knife...so measurements are approximate.  Fix it to the amount of people you're cooking for...so - more people = more ingredients. 😊

What you need:
  • 2% milk - approximately ½ a liter
  • 2 dl of heavy cooking cream
  • 1 medium sized onion diced
  • "Sulatejuusto" is a soft cheese for cooking and is thicker and heavier than cream cheese. You need a good sized chunk to thicken it.
  • Spices: salt, pepper, chili flakes
  • Bag of frozen chili flavoured shrimp (if this isn't available - natural flavoured is fine)
  • Dill
  • Slice of bread/dinner roll etc to have on the side
What to do:
  1. In a heavy bottom sauce pan warm the milk.
  2. In a separate frying pan - fry your diced onion.
  3. Add onion to your soup, along with a good sized chunk of the soft cheese.  The Finnish brand is Koskenlaskija.
    1. Make sure to stir well so the cheese doesn't stick to the bottom and melts evenly.
  4. Add your heavy cooking cream and spices.
  5. Once your soup is completely liquid (cheese has melted) and is bubbling slightly - add in your frozen shrimp until soup is bubbling again (about 2-4 minutes) and then serve with dill sprinkled on top.
  6. Enjoy with a dinner roll or slice of bread.

What I would do:
  • I would add perhaps 4 peeled and chopped cloves of garlic to the pan with the onions.
  • Fry the shrimp with the onions and garlic and top the soup with the shrimp.
  • Use coconut milk and cream for a lighter taste and to not have such a sore tummy after..
  • Maybe a squirt of lime juice with cilantro instead of dill...
  • Chili flakes - I love them so much.  Sprinkle that sh*t everywhere...
  • Skip the dill - dill and shrimp don't go together for me.
  • Maybe add some chopped veggies but I am on the fence about this one...it was just so heavy in dairy and cream - my guts were crying (but yet happily full) afterward.
Minor changes but perhaps if I make it sometime in the future - I will be able to feel what works and that's honestly how I cook.  I more or less wing it and hope for the best and go based on what feels right, tastes and smells good.

XO,
Dominique

Sunday, 11 March 2018

Side Dish: Cheesy Garlic Pull-Apart Bread


Who doesn't love garlic bread?  Besides the few that are allergic of course...
And who doesn't love freshly baked bread?  AND CHEESE?! Beside those that have dairy allergies too - that sucks truly...

Anyway - my point is - that I love cheesy garlic pull apart bread and it's wicked easy to make - although mildly time consuming.
And guess what? You can use your bread machine that has been collecting dust since your Aunt Judy dropped it off in fear of making Uncle Bert too heavy with the baked goods from it.

This recipe will be short and sweet.

Here's the recipe I use via Genius Kitchen (which I believe used to be "food.com") to make my Italian bread dough.
Bake according to the recipe and all will be fine.

**If you want it extra garlic-y - and who wouldn't?! Add some garlic powder in the machine too!

Image may contain: dessert, food and indoorNow, here's the recipe part!

What you need:

  • One Italian loaf - freshly baked and cooled
  • Butter
  • Garlic powder
  • Minced fresh garlic (optional)
  • Parsley (fresh or dry) chopped up
  • Shredded/grated cheese (I use a pizza mix from the grocery store)
  • Parchment paper
  • Bread knife (you know - the long zig-zaggy looking one)
What to do:
  1. Pre-heat your oven to 150*C.
  2. Melt about ½ cup of butter in your microwave or on the stove with the garlic powder (and or fresh).
    1. Add your parsley after butter is melted and give it a good stir.  Keep warm so it is still melted.
  3. Cut your loaf of bread in a criss-cross fashion. 
    **Don't cut all the way through the loaf or else you'll be making croutons...
    1. Cut approximately 4 vertical cuts then turn the loaf and cut in the opposite direction 4-5 times more. (Think like a checker board).
    2. The less you cut - the bigger the chunks.  It's up to you how many chunks of bread you want to make and the size of them.
    3. Set your loaf onto the parchment paper lined baking sheet.
  4. Put your shredded cheese inside the cracks you've created - both horizontally and vertically.
    1. YES you will put more cheese on top! Don't fret! The reason why you should stuff the cracks now with cheese is because it's easier and less messy than once you have butter poured in there and you won't burn your fingers this way either with the hot butter.
  5. Pour your garlic butter (watch your fingers!) all over the bread - making sure it's well coated inside each crevice and all over the top.
    Don't be ashamed for how much butter you use!  There shouldn't be a massive pool of it on the paper- but you want to ensure the bread is full of flavour.
  6. You can brush more butter on and around the loaf if you fancy and then top with shredded cheese.
  7. Bake the loaf on the center rack for about 5-10 minutes- until the cheese is melted and your house is smelling so delicious that the vampires won't be coming over anytime soon...
  8. Enjoy!
Image may contain: food
I should've added more cheese.
Be careful as this will be piping hot because the hot melted garlic-y butter and the cheese will be gooey and yummy and so lovely!
And all you have to do is just pull those chunks of cheesy garlicy bread off as you go and enjoy it!!

Serve this up when having a game night with your friends or as a side for a salad (just kidding!) and pasta night!  Also goes well with a nice stew or soup on a chilly day!

It looks fancy with minimal effort.

Add extra garlic butter for dipping -because why the heck not?!

Enjoy...and don't forget to wear your stretchy pants...it's how I roll personally. :)

XO,
Dominique

Thursday, 8 March 2018

Sweet Tooth: Chocolate PIZZA!

No you aren't blind and while your glasses might be dirty like mine - I did write "chocolate pizza" in the same subject heading.

I don't know about you but this thing has been making it's way all over social media.

Via Google Search
Even Finland has it...Canada too apparently.
I wanted to try it but had my doubts.  So I decided to make my own.

I was seriously conflicted with whether or not to make an actual pizza dough (the nice fluffy kind) with cocoa powder mixed in and chunks of chocolate so it'd be all nice and gooey when baked...then I looked at the time and realized my BFF Alison was coming over soon - so I'll nix that idea for another time.

I thought quickly and decided I'll go with option 2.
I whipped up a chocolate chip cookie dough, sprayed my hands with cooking spray, spread it on parchment paper then baked it.
Once it was cooled down - I spread Nutella then I placed sliced strawberries, fresh blueberries and chopped dark and milk chocolate chunks.  I took a veggie peeler and shaved some white chocolate all over and sprinkled toasted coconut on it.
BAM.
It wasn't too sweet and a friend of mine said it looked like "tasty diabetes"...Alison confirmed it was delicious...

Please note something crucial here:

I don't like chocolate that much.  I am NOT that woman that needs chocolate monthly or daily...I'm okay without it.  Once in awhile I'll enjoy chocolate with some kind of filling inside - a piece or two.  That's it. I never get chocolate ice-cream because that's boring to me.  I prefer vanilla or some other fancy pants flavour.

So...want to live dangerously with me and make this yourself?

Let's do this!

What you need:
1. Chocolate Chip Cookie dough (use your favourite recipe for chocolate chip -or other favourite cookie  for the base) - or keep reading and wing it like I did:   
  • ½ cup of butter softened
  • 2 large eggs
  • pinch of salt
  • splash of vanilla extract
  • ½ cup of brown sugar (softened)
  • 2 cups of all purpose flour
  • ½ tsp of baking soda
  • 1 tsp of baking powder
  • a heavy shaking of chocolate chips (I used dark ones - but use what you got or like!)
Place ingredients in mixing bowl and mix as you add the ingredients as ordered above.
  • Cooking spray (just a bit for your hands)
  • Nutella (or any knock off store brand will do!)
  • Dark chocolate cut in small chunks
  • Milk chocolate cut in small chunks
  • white chocolate 
  • fresh berries or fruit of your preference (bananas, kiwi and others could work well for this!)
  • toasted coconut (optional)
  • veggie peeler for the white chocolate
Before baking
What to do:
  1. Pre-heat your oven to 175C and make your cookie dough.    
  2. Spritz your hands lightly with cooking spray to prevent sticking to the dough and spread your dough evenly along your lined baking sheet.
  3. Once your oven is ready - bake it until golden brown.  About 15 minutes.
  4. Let it cool a bit and spread your Nutella evenly all over the giant cookie.
  5. Top with mixed chocolate chunks, berries and/or fruit.
  6. Using your veggie peeler - shave white chocolate on top.
            1. Add toasted coconut too if you like.
  7. Cut and enjoy!

The final product!
This is totally flexible with flavours - you can make the cookie base your favourite cookie - a standard single batch recipe should be fine and just stretch it thin enough and evenly to cover your pan.

Other topping ideas I have:
  • nuts
  • peanut butter sauce
  • chocolate sauce
  • caramel sauce 
  • jam/jelly or marmalade
  • various sliced fruit
  • other berry combinations
  • granola/museli
  • mini marshmallows
  • crushed cookie crumbs
  • candy
I hope you enjoy making this as I did!! It was so easy and delicious!  Definitely something different for your next potluck or baby shower and it's eye catching too!
Let me know if you make it!  I would love to see pictures!

XO,
Dominique

Sweet Tooth: Mini Bailey's Chocolate Cheesecakes

Cheesecakes come off as one of those desserts that cost an arm and a leg in a restaurant - but there's really not much to them if you wa...